A press review copy of the module was provided. Find more Roll20 Reviews on my website and YouTube channel.
“The Reaper’s Right Hand” is the fifth module in the War for the Crown Adventure Path, designed for PCs of 13th level. At this level adventures really need to ramp up the scope and challenge rating of what the PCs are facing.
The module does a brilliant job of upping the stakes by depositing our heroes into Axis, the plane of law, as they must search for the missing ascended emperor while dealing with a diverse cast of extra-dimensional beings and troublemakers.
The following content is included in the $24.99 “The Reaper’s Right Hand” (War for the Crown 5 of 6) module:
- 4 5-ft battle map with Dynamic Lighting (for Roll20 subscribers)
- 1 non-gridded city map (Sayashto)
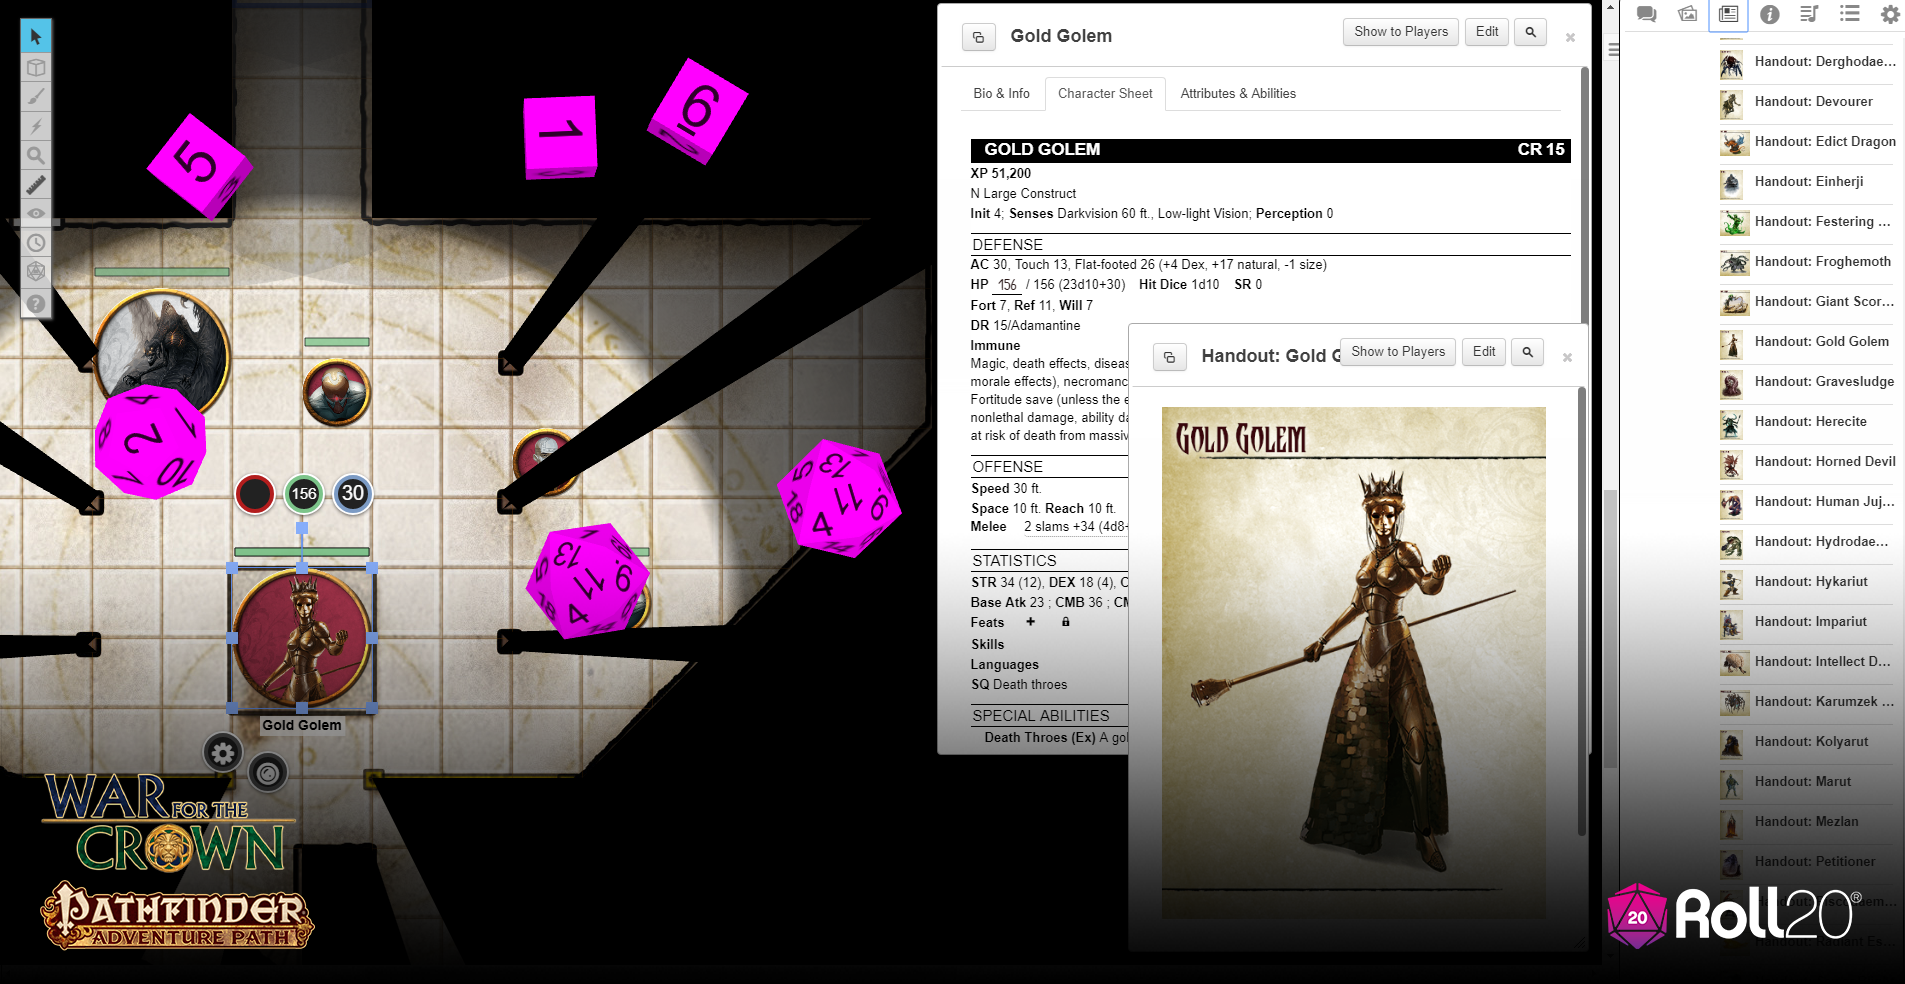
- 37 unique named NPC character sheets with matching tokens and GM descriptions (23 w/ pics & player handouts)
- 54 NPC monster sheets with draggable tokens, vision, and separate player handouts.
- 77 Magic Item player handouts (13 w/ pics)
- Alphabetized token page of all NPCs and creatures.
- Journal organized into three parts, each containing DM notes, maps and player handouts
- Extra notes and lore on Sayashto, Thamir Gixx, and the Noble Lines of Taldor
- Rollable tables for optional random encounters in and Sayashto; rollable tokens for shapeshifters.

“The Reaper’s Right Hand” may be my favorite story of the Adventure Path thus far. It begins with a huge problem let over from the last module: the villainous Pythareus had discovered the illegitimacy of the Stavians. With his death (or capture) at the end of “City in the Lion’s Eye,” his allies have responded by releasing this information. Now Princess Eutropia’s claims to the throne are in jeopardy, and Taldor’s civil war looms worse than ever.
A long-lost tomb holds the key: an artifact from the original Emperor Taldaris himself that can verify and appoint any ruler to the country. Eutropia sends the PCs to find the location of the forgotten tomb and use a ritual to retrieve the Mantle of Kings.
That’s just Part 1! The tomb itself is a really neat dungeon crawl filled with traps and construct guards. It also tells an informative story, as the PCs need to learn how to properly conduct the rituals by examining the many murals along the walls. Hazards include animated golems and angels, guardian celestial lions, a trap that turns people into tiny statuettes, and a trap that reverse gravity into a starry-skied ceiling that transforms into blazing hot suns. Delightful.
Of course performing the ritual and summoning Taldaris isn’t so simple – he’s been captured. Instead of drawing him to them, the PCs are teleported into an entirely different plane, Axis, and deposited into the city of Sayashto.
Part 2 encompasses the PCs’ investigation as they figure out what happened to the immortal emperor. When transported they’re treated to several interesting, seemingly random scenes, but each one can be followed up on as part of the investigation, as well as knowledge learned from the tomb. Highlights include running a political campaign against a medusa, having tea with a 10,000 year old angel of death, helping an animated doll evade capture, and tracking down an intellect devourer who had been taking over the local post office – which uses void dragons as couriers.
Only two battle maps are included in this section, but most of the scenarios consist of only a single encounter, if any at all, so it wouldn’t be hard to quickly whip together a few maps for one-off encounters.
I’m (mostly) willing to forgive the lack of visual aids in this section as the events and characters in Sayashto are so delightfully unique and interesting. Yes, we’re once again giving the PCs free roam around a city to investigate something, as has been the case with nearly every single module in the War for the Crown, but Sayashto looks quite memorable.

The investigation turns out to be mostly optional (though PCs get bonus items, XP and info depending on how well they performed). An event in the cemetery railroads the players into a conclusion, opening up the path underground that serves as the finale to the module.
The cemetery is a small-ish map but filled with lots of dangerous creatures, including sentient open graves, a sewer blight, some kind of monstrous swamp horse, and a giant froghemoth.
Like Part 1, Part 3 mostly consists of a single dungeon crawl, and it’s another winner. All the various villains who have been harassing our heroes during this module can retreat and make an appearance here. The actual boss, the Secret Shade, roams around the dungeon causing havoc.
The PCs aren’t entirely without assistance. In a neat callback they can find and partner up with Wyssilka, the end boss of the very first module, “Crownfall,” who had been sent here as punishment.
Rescuing Taldaris is actually fairly straightforward. He’s in a literal jail cell. But the dungeon is packed with excellent traps and terrifying enemies. The final encounter teases a bomb-shell of a cutscene: while the PCs were in this other plane rescuing Taldaris, their enemies have assassinated Princess Eutropia!
 “The Reaper’s Right Hand” does a fantastic job moving the overarching plot along while still telling a compelling story within the cool extra-dimensional world of Axis.
The Pros:
- A pair of excellent dungeon crawls that bookend the module.
- Diverse cast of otherworldly allies and villains.
- Excellent story that dumps our PCs into a city in the plane of law, where they must gather clues and follow leads.
- Delightful mix of fantastical creatures, from astral demons to mechanical angels to a bookworm gnome made up of actual worms!
The Cons:
- Part 2 needs a few more maps or player handouts.
- Most magic items lack pictures.
The Verdict: “The Reaper’s Right Hand” includes all my favorite elements in a module: deadly dungeon crawls, interesting and quirky characters, and an intriguing mystery.
A press review copy of the module was provided. Find more Roll20 Reviews on my website and YouTube channel.
